A strong travel photo can perform well in a carousel, but when you need a quick Instagram Reel teaser, that same image often feels static. It has the view, but lacks the movement and pacing that short-form video requires. For beginners, building a full travel edit from scratch for a single post is rarely worth the time.
That’s where many people get stuck. Some overwork the photo until it looks unnatural, while others post the image as-is and hope music will do the rest. Neither approach typically yields a useful teaser. A lighter image-to-video workflow is often the better fit, especially when you only need a short preview. If you want to test that kind of setup in a browser, Media.io is a practical place to start.
The Real Problem Behind Travel Photo Teasers
The problem isn’t the photo itself—it’s that a still image and a Reel are trying to do different things. A destination photo captures one moment well, but a Reel teaser needs motion, pacing, and a sense of atmosphere, even if the clip runs only a few seconds. A slow push toward a skyline or a soft drift across a beach scene can change how the image lands, making it feel like a native short video instead of a reused still.
Beginners usually go wrong in one of two ways: they add too much artificial motion, making the result distracting, or they leave the image static and call it finished. Sometimes that works, but it rarely creates anticipation. For this kind of content, the goal is simple: turn one good travel photo into a short Reel-style preview without overcomplicating it. That’s why Media.io’s image-to-video tool is worth trying.
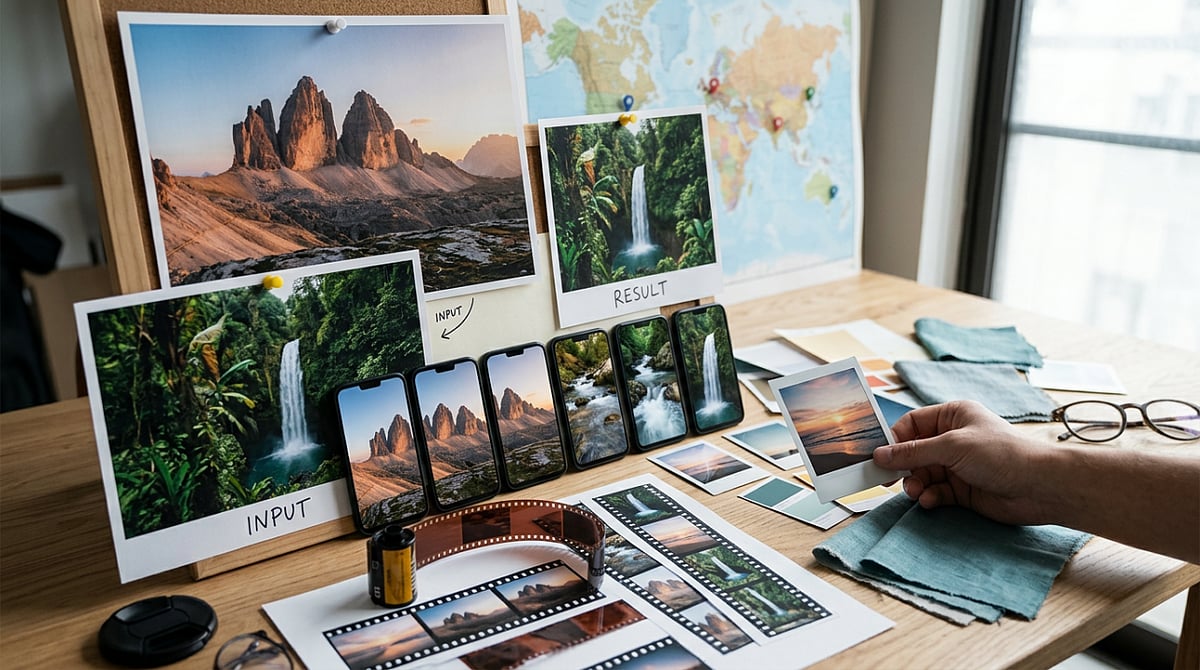
What a Publishable Result Should Look Like
For travel teasers, a publishable result is easy to define: subtle motion, one clear subject, and a vertical-friendly clip that feels at home on Reels. It should feel clean and watchable, not busy.
That usually comes down to a straightforward workflow: upload the image, add a motion prompt, choose from a few video models, and compare the results. Keeping those steps in one place helps, especially if you don’t want to bounce between tools. Media.io also includes 5,000+ templates, free daily credits for testing, and the option to add music or do light editing after generation.
One thing beginners often miss: longer prompts do not automatically give better results. With travel teasers, clear and simple usually works better. A single image plus one restrained motion idea often produces a better clip than a long prompt trying to force too much into a few seconds.
How to Complete Travel Photo Teasers with Media.io
You don’t need a big workflow. If the photo is strong and the motion idea is clear, three steps are usually enough.
Step 1: Start with One Strong Travel Photo
Open Media.io and go to the image-to-video workflow. Upload one destination photo with a clear subject, such as a beach path, skyline, street scene, or mountain view. The best starting images already have mood, depth, or a clear visual direction. Avoid busy collages or weak snapshots—a tool can animate a still image, but it cannot fix a cluttered composition.
Step 2: Add a Motion Prompt and Choose a Style Direction
Describe the kind of motion you want. Keep it short and visual, for example: “slow zoom toward skyline,” “gentle pan across beach,” “soft cloud drift,” or “subtle push-in on city street.” That’s usually enough. Then choose a model or template direction that suits a travel teaser. Travel content usually looks better with smooth motion and atmosphere than with a promo-style look. Since Media.io puts multiple video models in one workflow, you can try different directions without switching platforms.
Step 3: Generate, Check the Feeling, and Export
Generate the clip, then watch it for overall feel rather than just technical movement. Does the motion support the scene, or does it pull attention away? If it feels too busy, simplify the prompt and try again. If it feels flat, test a slightly stronger zoom or pan. Once the motion looks right, add music or light polish if you want a more complete Reel teaser. Then export it and check how it fits into your posting flow.
Tips and Mistakes to Keep in Mind
- Keep motion prompts short and tied to the actual scene. “Slow zoom on snowy peak” usually works better than a long prompt with extra actions.
- Match the motion to the image. A skyline can handle a push-in. A beach scene works with cloud drift or a soft pan. A narrow street often looks better with gentle camera movement.
- If possible, test more than one output. Results vary based on the image, model, and prompt clarity. Free daily credits make this easier.
- Avoid starting with a crowded image that has no focal point—movement can look messy when the eye has nowhere to settle.
- Don’t ask for too much action from a calm scene. A quiet lake photo doesn’t need dramatic movement, just enough to add mood.
- Check the vertical format early. If the image doesn’t adapt well to a Reel layout, the teaser can feel awkward before animation starts.
Final Takeaway
If you already have strong travel photos and need quick social-ready motion, this workflow is a solid fit. It takes less effort than building a full travel video and usually gives you a stronger result than posting a static image with music. What makes it useful for beginners is how connected the process feels: upload a photo, add motion, compare model outputs, and make light refinements in one browser-based workflow. Start with one destination photo, turn it into one short Reel teaser, see what works, adjust the motion, and repeat.
FAQs
Do I need editing experience to make Reels from travel photos?
No. If you can pick a strong image and describe simple motion, you can make a usable teaser. The bigger learning curve is choosing the right photo and giving the tool a clear prompt.
What kind of travel images work best for image-to-video?
Photos with a clear subject, visible depth, and a strong sense of place usually work best. Skylines, beaches, mountain views, street scenes, and landmark shots are all good options.
Can I add music after generating the motion clip?
Yes. In many cases, that’s the better order. Generate the motion first, check the result, and then add music or light polish before posting.
Leave a Reply